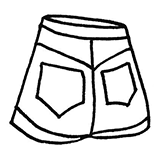
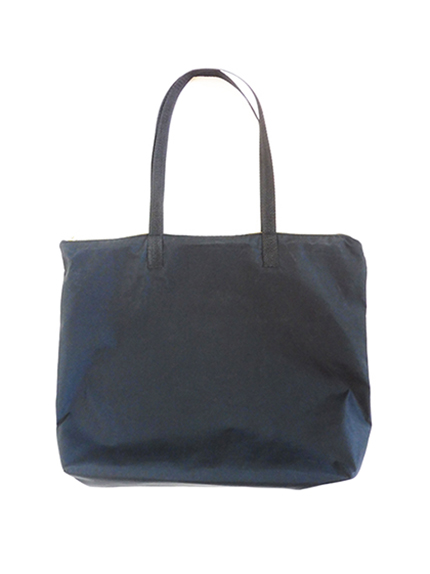
The below bag I made is very simple and easy to make. This bag requires only one piece of true rectangular-shaped fabric for the outer layer.
Decide on the size of your bag
First, you should decide how big your bag should be. The fabric prepared for the above bag is 31 inches by 17.5 inches including 0.5-inch seam allowance. I decided on these dimensions in front of a mirror. These dimensions were the best size for my body size and what I would carry in it. You should determine the perfect size for yourself in front of a mirror too.
Placing a lining can be easier than without
You will have to decide if you want a lining in your bag or not. I totally recommend placing a lining for many reasons. You might think that it will be added work, but that’s not really the case. Lining not only looks better than without, but it could also reduce the time and effort you would put into the whole bag. Besides, lining makes the bag more durable, of course.
In this bag, I placed an inner pocket and a label. So, it might have taken as much time as a bag without a lining. However, if you are not placing an inner pocket or a label, lining can save you time. A bag without a lining requires overlock stitches on the seam allowances. And the time to prepare an overlock serger machine—connecting the power code to the serger, choosing and placing four spools of thread, threading the serger, adjusting the settings and stitch sizes, and sewing a swatch fabric to test the stitches—can add up.
As a matter of fact, if you don’t own a serger, placing a lining is a must because an overlock stitch option on a regular sewing machine does not give as nice and neat look as a serger does. But even if you have a serger, I recommend placing a lining.
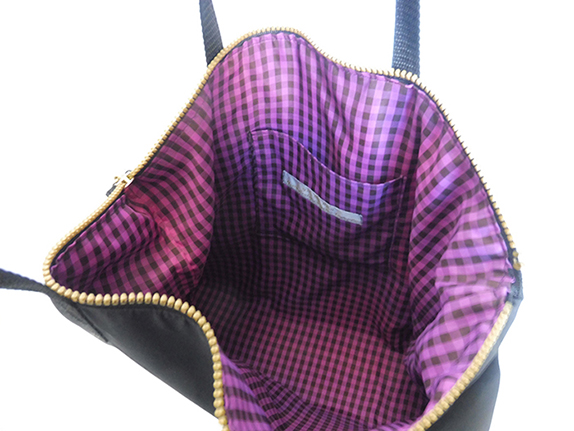
Inside the bag
Cut the fabric
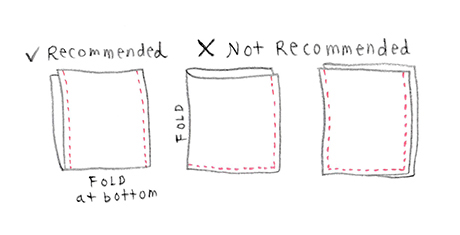
The fabric is folded in half to make a double, and two sides are stitched. I don’t recommend folding the fabric to the side, or cutting two separate fabric pieces for front and back unless your fabric isn’t big enough to cut one large piece. The bottom should be seamless for better resistance to weight (Figure 1). Assuming you are placing a lining, you will be cutting a lining fabric in the exact same size as the outer fabric as well.
Figure 1
Prepare an inner pocket
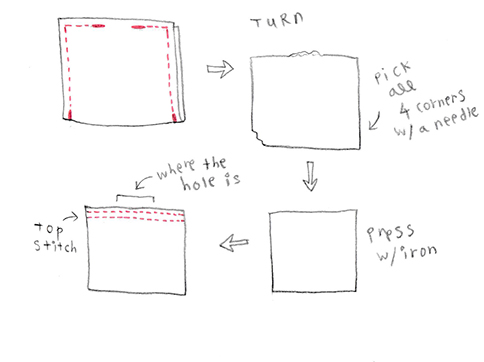
If you are placing an inner pocket, cut that fabric as well. I usually double the pocket lining when using a lightweight fabric. For this bag, I cut a piece 6 inches by 11 inches. You will fold this fabric right sides together to make it double, and stitch around three straight raw-edged lines. But you will be leaving a small hole to turn the fabric inside out. The size of the hole really depends on the thickness of your fingers and the weight of the fabric. But 1.5 inches should be good.
Turn the fabric inside out. Press with an iron. (Be careful of the type of fabric you are using. For lightweight synthetic fabric, the temperature must be low.) Top stitch the top part of the pocket (Figure 2).
Figure 2
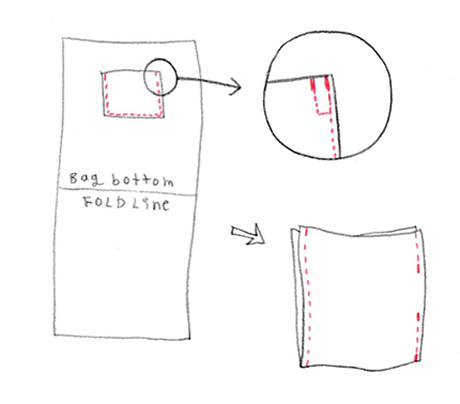
Place the inner pocket to the part of the lining where you want it to be. It should be at least 2 inches below the top raw edge. Stitch around the pocket as shown below. After that, fold the lining right sides together in two to make it double. Stitch two sides except that one side should have about 3 to 4-inch opening in the middle (Figure3).
Figure 3
Placing a zipper
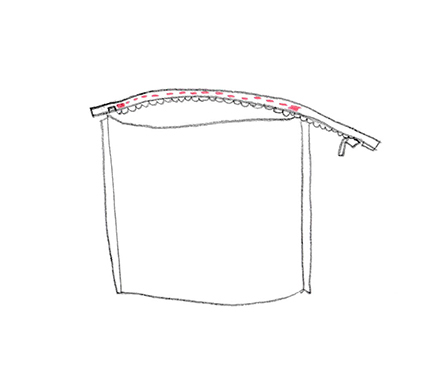
Place the appropriate side of the separating zipper at the top raw edge of the outer fabric (Figure 4).
Figure 4
Connect the other side of the zipper at the edge, and close it. Pin the unstitched side of the zipper to the unstitched side of the raw edged top of the bag. Stitch. Close the zipper all the way, and place a metal tooth at the end of the bag opening with a plyer. Then, cut the excess zipper.
The best way to add a gusset to the lightweight fabric bags
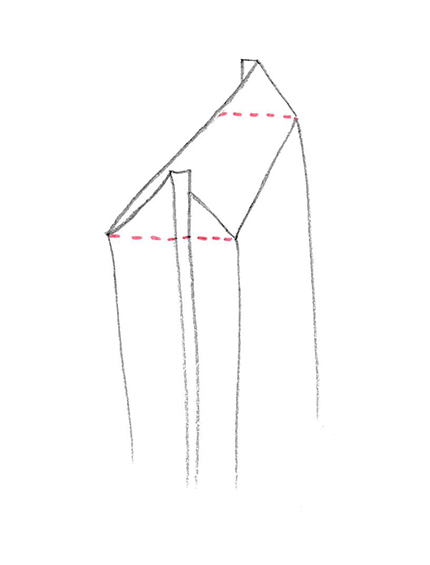
You may want to add gusset to the bag. Making the gusset too wide would make it look out of shape when you carry a heavy flat items like a notebook in it. For this bag, I added a 2.5-inch-wide gusset. Stitch the bottom of the bag, both on the outer fabric and lining (Figure 5).
Figure 5: The easiest and the most efficient way to add a gusset to the bag without producing waste
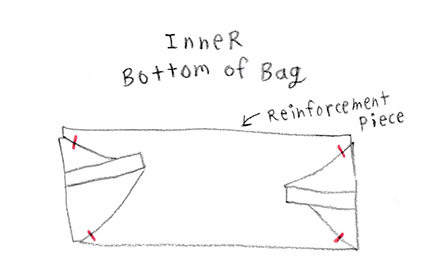
Bottom reinforcement
I placed a bottom reinforcement for this bag to keep its shape. I didn’t want it to be too stiff, but hard enough to support what’s inside. For this, I used a thick cowhide that I had in my inventory. I stopped buying leather for sewing, but I still have some left, and I’m always looking for some perfect ways to use them and show them some appreciation.
This bag has a 2.5-inch wide gusset. So, the bottom reinforcement should be about 2 1/8 inch wide. In other words, the piece should be about 3/16 inch (about 5mm) smaller all the way around. Place it at the bottom of the wrong side of the outer fabric. Then, using the largest stitch available on your machine, stitch roughly about 2 to 3 seams back and forth using back stitches near the four corners (Figure 6). If you do not have a heavy-duty machine, do this step by hand-operating the wheel yourself. For back stitches, turn the fabric to adjust the location of the targeted area, and continue with forward stitches.
Figure 6
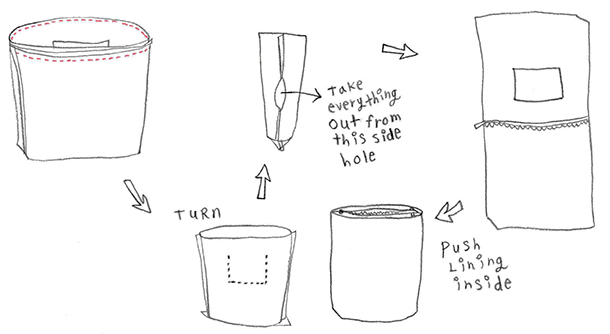
Connecting outer fabric to the lining
When above is done, top stitch about 3/16 inch (0.5mm) from the edge of the fabric where the zipper is sewn.
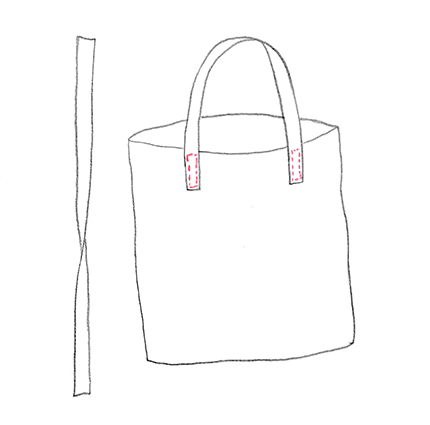
Placing handles
I usually make handles with the same fabric as the body of the bag. But for this one, I didn’t have enough fabric, so I used black nylon webbing—the flat type of rope that’s sold by the yard. You may want to temporarily place the webbing onto the bag with safety pins to determine how long the handles should be in front of a mirror.
After you decide the length and cut two pieces of webbing, use a lighter and let fire touch the freshly cut edge to melt it a little bit to prevent it from fraying. Place the webbing back onto the bag, pin them again to make sure where you want to place them. Stitch around the end of the handles. For patch handles like these ones, I recommend stitching over (together with) the lining (Figure 8) unless you are placing a reinforcement piece on the back of the outer fabric.
Figure 8
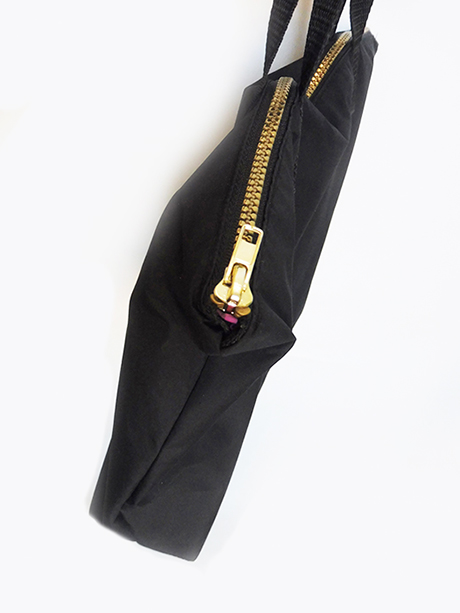
View from the top. Gold coated Vislon plastic zipper is used.
No pattern needed
After completion, do not even try to create a pattern for this kind of straight-lined square or rectangular simple piece of bag for future use. Rather, it’s best to simply keep the numeric record of the dimensions of the fabric piece and length of gusset and handles. The pieces come out nicer when the fabric is cut straight without using a pattern paper. The best way to cut a straight line on a relatively thick fabric is to draw a line directly onto the fabric with a loose powder chalk and cut along it. So, do not waste your pattern paper and your time creating a simple rectangular pattern piece.